Designed and made by DRIVE Pickleball
in New Berlin, Wisconsin:
- Designed with superior function and appearance in mind.
- Made with weather resistant white PVC
- Keeps the paddles neatly aligned with ample space between them for easy placement.
- Aluminum track for a smooth sliding “NEXT” indicator
- Holds 19 paddles
- Holds up to14 pickleballs during play
- Versatility allows three different ways to use the rack:
- Wall mounting for fixed use or daily removal.
- Fence mounting for fixed use or daily removal.
- Stand it on any hard surface with the aluminum legs.
- Aluminum legs attach in seconds using rare earth magnets.
- Legs store neatly within the framework of the rack.
- Bright orange acrylic “Play to NINE” indicator
- Built-in Carry Handle
- Accommodation for uniquely shaped handles: Yellow pegs (included) will be placed in the V-notch instead of a paddle that has a ball retriever or non-conventional handles.
- Four in Four out markers. Separate paddles by fours with the yellow pegs.
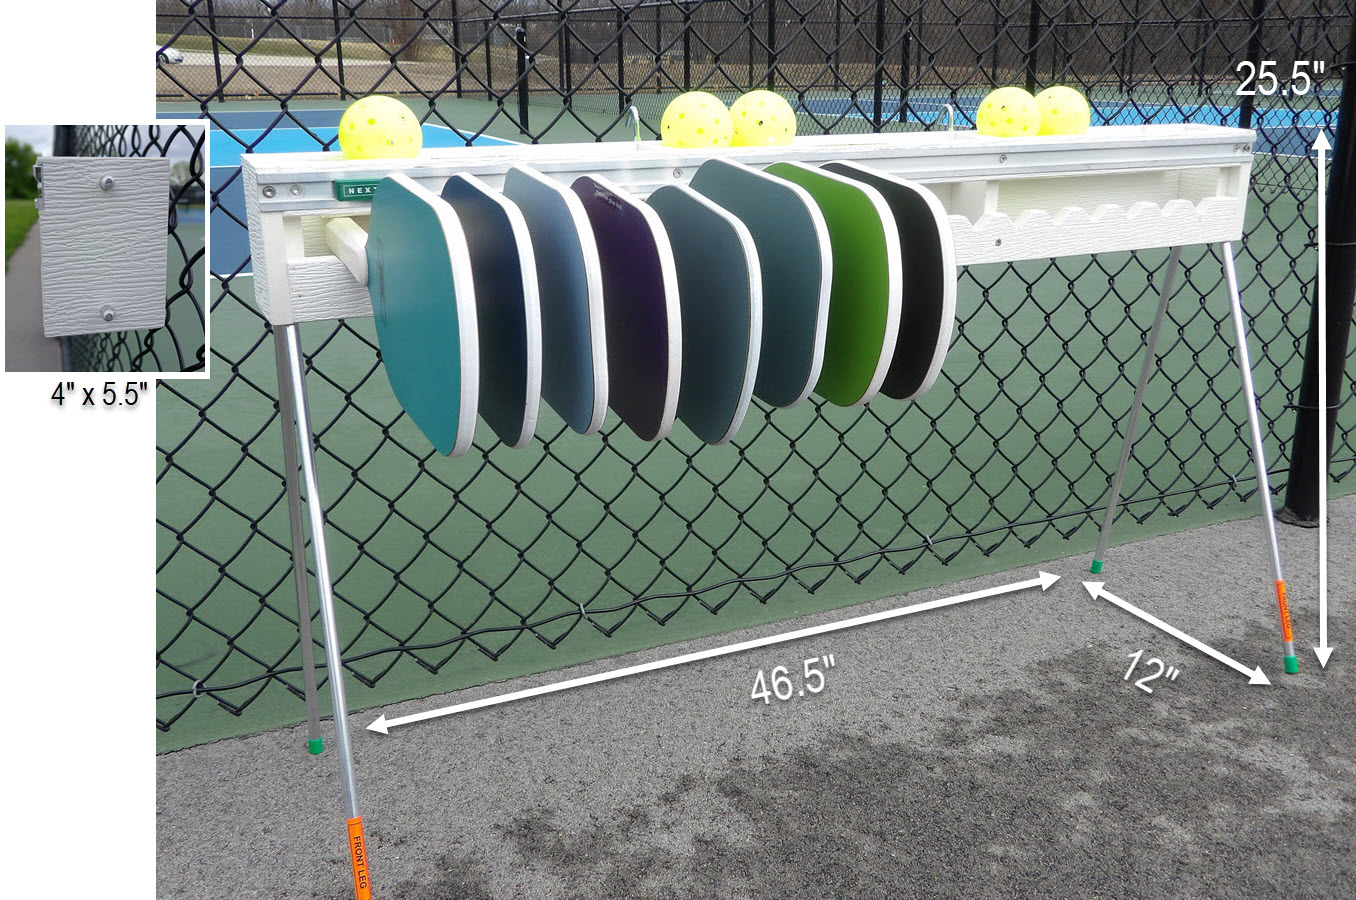
DIMENSIONS
Length 46.5″
Height standing on legs 25.5″
Footprint 46.5″ x 12″


")

")
")


Versatility allows three different ways to use the rack:
Free Standing:
with the built-in aluminum legs.

Sturdy Legs
- Aluminum legs attach in seconds using rare earth magnets.
- Legs store neatly within the framework of the rack.
Color Choice
The color of the “NEXT” indicator, floor protectors (leg caps) and the leg storage clips will match. The color choices are blue or green.
Fence Mounting:
for fixed use or daily removal.


It may not be noticeable, but the space between the “diamonds” on a chain link fence varies. The best place for the (two) hooks to rest is the bottom of the “diamonds” where the links cross each other.
Hooks will be pre-mounted to the back with a 2” screw in the lower of the (two) holes in each hook.
This allows the hook to pivot left or right. Simply move the hooks (they should mirror each other) until they fit your fence as shown in the photos.
Two additional short screws will be provided. We encourage you to install them in the empty hole of each hook to maintain its position.
The rack is easy to hang and easy to remove. If your intention is to leave it in place at an outdoor facility, we have options to discourage someone from easily lifting it off the fence. We’re referring to spontaneous removal, not those wielding a bolt cutter. Contact us to talk about it.
Wall Mounting:
for fixed use or daily removal.


Concrete walls require different wall anchors than drywall. We need to know what walls you have so we can include the correct wall anchors and screws. Check the applicable box when ordering. The anchors and screws will be used to fasten the Z-clips to the wall.
We will attach two Z-clips to the rack.
You will complete the system by fastening two Z-clips to your wall. Solid walls require a hammer drill and masonry bit. Instructions will be provided.
Using the NEXT indicator
Place paddles in the rack from left to right. The NEXT indicator will always be placed directly over the first of the next group to play.
As paddles are removed, do not pick up the remaining paddles and move them over (there will be empty spaces to the left of the paddles.)
Move the NEXT indicator to the right and place it over the first paddle of the next group to play.
Continue sliding the indicator to the right until the last group of paddles (at the right side of the rack) have been removed, then move the indicator back to the left.
By that point, the left side of the rack may have started to fill in with paddles. Place the NEXT indicator above the first paddle on the left.
Keep in mind, the rack will always look different depending on the number of players using it. There will be empty spaces at the ends or in the middle. The key is to KEEP MOVING THE NEXT INDICATOR!
We understand there are a variety of “systems” in the US to keep the games moving when the courts are full. The one described above is consistent with our area. We would like to hear from you about ways we can accommodate your version. If possible, we will customize the rack to work with it.